Padded cycling shorts are the one piece of kit that decides whether a long ride feels like a ride or a slow argument with your saddle. I have watched riders spend a whole season chasing a lighter wheelset and then line up for a 100 km charity ride in whatever shorts were on the clearance rack, and I have watched kilometer 70 ruin the day for them.
The discomfort most riders blame on the saddle is usually a chamois, a size, or a position problem. Padded cycling shorts are a measurement problem before they are a shopping problem. Get the measurement right and the shopping gets short: one pair for training, one pair for the long days, and a wash routine that keeps both alive.
This covers how to measure, how to check fit in the first 100 km, how to make a pair last, and the two pairs I would put most riders on, one at each end of the range.
Why you should trust me
I have been in bike shops since I was 19. Twelve years as a mechanic, five of those as a service manager, and now I run a one-bay shop in Boulder called Mitch's Bench, where I rebuild hubs, fit saddles, and torque everything to spec because hand tight is how expensive things get loose.
Shorts and saddles are the two things customers ask me about most, and they are the two things where the answer is a number. Sit bone width comes off a foam pad. Saddle width follows from that number. Short size comes off a tape measure around your hips, not off the size you wear in jeans. I keep the foam pad in the shop for exactly this reason, and I will not fit anyone, including myself, without using it.
My rule for anything I recommend is 500 km on the product or 100 cycles of the mechanism. If a chamois has not survived a season of Tuesday worlds and a winter of trainer rides, it does not get a recommendation from me. I also ride about 15,000 km a year, most of it before 7 a.m. or after 6 p.m., because the shop owns the day.
How I picked and how I tested
Shorts are simple to evaluate once you know what fails. Four things go wrong, in this order.
The chamois compresses. A pad that feels plush in the dressing room flattens where your sit bones land, and once it flattens, pressure goes straight into soft tissue.
The gripper dies. Silicone loses its hold, the hem creeps up, and the pad goes with it, so the last hour of every ride happens with the chamois in the wrong place.
The seams abrade. A seam that sits under your sit bone rubs through the fabric long before the fabric wears out anywhere else.
The waistband rolls. This is specific to shorts rather than bibs, and it is the reason so many riders move to bibs after their first long season.
So the checklist I run is chamois density and placement, gripper material and how it is attached, seam location relative to the sit bone contact patch, panel count, and whether the short holds its shape when it is wet with sweat. A short that only works dry is a short that works for 45 minutes.
The two pairs below are the ones I would start most riders on. One is a plain short with pockets and a price that makes it an easy first pair. The other is a race-cut bib for riders who already know their position and want the pad to stay put for four hours. I am not going to quote a spec sheet at you. Check the listing for the chamois and fabric details, then use the fitting steps further down.
Two pairs that cover the range
Between them these cover almost every rider I fit. If you ride to work, ride the trainer, or ride trails and want pockets, start with the short. If you ride road miles and want the pad exactly where you put it, start with the bib.
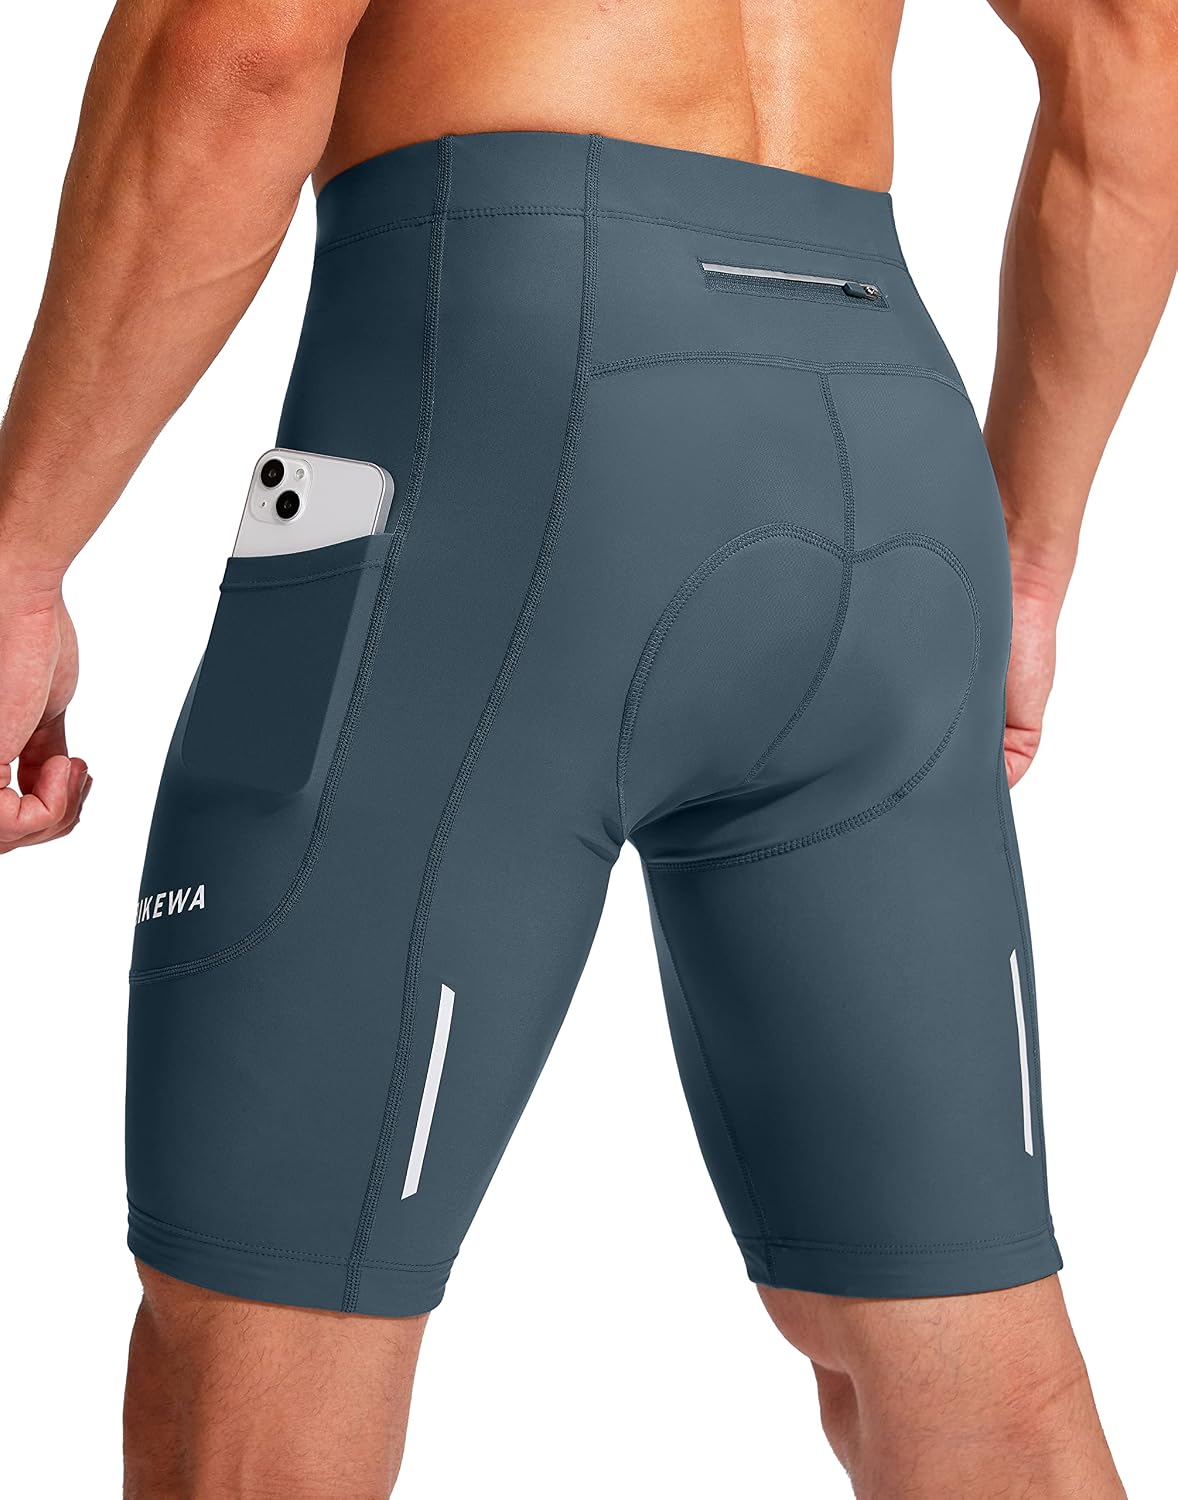
Budget pick: Bikewa Men's Bike Shorts 3D Padded Cycling Road Biking Mountain Riding Biker Bicycle UPF 50+ Cycle Shorts Zipper Pockets
 Visit on Amazon →
This is the short I hand to riders who are not ready to commit to bib straps yet, and it is the right answer for a lot of riding. It goes on like any other piece of clothing, which matters on a commute or in a shared gym changing room. The zipper pockets are the detail that sells it for commuters and trail riders, because a key, a card, and a phone need somewhere to live that is not a jersey pocket you forgot to zip.
The 3D padded chamois is the part that does the work. Padded shorts at this end of the range live or die on pad placement, so check that the pad sits under your sit bones when you are actually on the bike, not when you are standing in front of a mirror. The UPF 50+ rating answers the sun exposure question for summer riders, and the short cut means no straps to adjust.
Sizing is the one place to slow down. Measure your hips and waist with a tape and use the chart on the listing, because a loose chamois is worse than no chamois. If the pad moves when you pedal, the size is wrong.
Flaws but not dealbreakers: A short relies on a waistband to hold the pad in place, and waistbands move more than bib straps when you are bent over in the drops. If you are doing four hour road rides, read the next section.
Riders who commute, ride the trainer in winter, or want pockets on a mountain bike will get the most out of this pair.
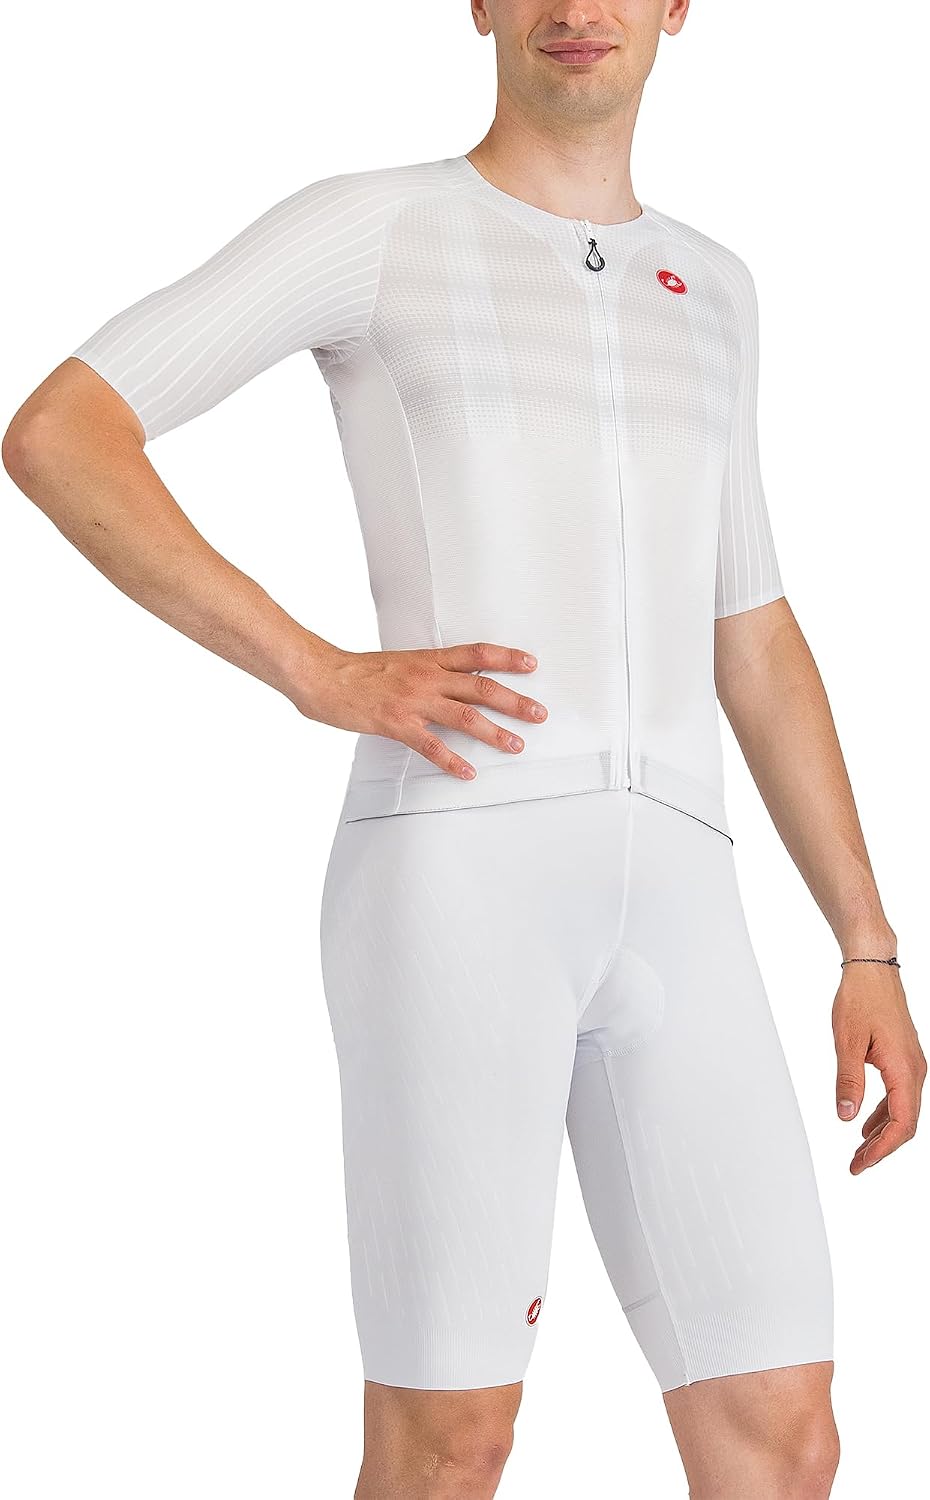
Upgrade pick: CASTELLI Men's Free Aero Race S Bibshort
 Visit on Amazon →
Bibs are the answer to the waistband problem, and this is the race-cut version of that answer. The straps hold the chamois against your body without a band digging into your stomach, which is often the difference between a comfortable four hour ride and a comfortable two hour ride. There is no waistband to roll, no gap at the small of your back when you are bent over the bars, and nothing to shift when you stand on a climb.
Free Aero Race is a race fit, and that word means something. It is cut close and compressive on purpose, because fabric that does not move is fabric that does not chafe. If you want a relaxed, casual short, this is the wrong purchase, and I would rather tell you that now than have you buy it and hate it.
The other thing race bibs give you is a pad that stays put at speed. On a fast group ride you are not shifting around in the saddle, so the chamois needs to be exactly where it was when you left the driveway. Straps are how that happens.
Flaws but not dealbreakers: Race-cut bibs leave less room for error in sizing. If you are between two sizes, that is a question for the brand chart and the listing, not for a guess.
Road riders, fast group riders, and anyone doing rides long enough that a waistband becomes a distraction should look here first.
How to measure your sit bones before you buy anything
Short size and saddle width are two different numbers, and riders confuse them constantly. Do this once and both get easier.
Step one: the foam pad. A piece of corrugated cardboard on a hard chair works, though I use a foam pad in the shop because it holds the impression better. Sit squarely with your knees at 90 degrees and your feet flat, then lean forward slightly, the way you sit on a bike rather than the way you sit at a desk.
Step two: measure center to center. Stand up and find the two depressions. Measure the distance between their centers. That number is roughly your sit bone width.
Step three: add for the saddle, not the short. Saddle width follows from sit bone width plus your riding position. This is why a fitter asks about your position before recommending a saddle, and why the same rider can need two different saddles for two different bikes.
Step four: measure your hips and waist for the short. The tape goes around the widest part of your hips and around your natural waist. Use those two numbers against the brand chart. Cycling shorts are sized on body measurement, not on the size you wear in jeans, and the gap between those two numbers is where most returns come from.
Step five: check pad placement on the bike. Put the shorts on with no underwear, get on the bike, and put your hands in the drops. The pad should be under your sit bones. If it is forward of them or behind them, the size or the cut is wrong.
How to check the fit in the first 100 km
Do not test new shorts on the ride you care about. The first 100 km tells you whether the fit works. Here is the sequence I give customers.
Ride one: the trainer or a short loop, 45 minutes. This is a break-in ride and a check for seam placement. Anything that rubs at 45 minutes rubs at four hours.
Ride two: your normal loop, 90 minutes to two hours. This is where grippers show themselves. If the hem creeps up, the pad moves with it.
Ride three: a long ride, three hours or more. This is the real test. Chamois cream, no underwear, and a fresh wash before the ride. If you are sore in the soft tissue rather than at the sit bones, the pad or the position is wrong.
Write down what happened. Note where the pressure was and how many kilometers in it started. Every complaint is a measurement problem, and a number is easier to fix than a feeling.
Know when to stop. If you are still adjusting at kilometer 200, stop adjusting and change something. A pad that never settles is not going to settle.
How to make a pair last
Shorts die in the laundry more often than they die on the bike.
Wash after every ride. Sweat and salt sit in the chamois and break down foam and adhesive. A pair left in a gym bag overnight ages twice as fast.
Inside out, cold, gentle. Turning them inside out cleans the chamois and keeps the outer fabric from being abraded against zippers and buckles in the load.
No fabric softener, no dryer. Softener coats the fibers and kills the wicking. Heat kills the elastic in the gripper and the straps.
Hang dry, out of direct sun. UV is fine on your legs, not on elastic.
Rotate two or three pairs. This is the cheapest durability upgrade there is. A pair worn twice a week lasts longer than a pair worn every day, because the fabric gets a day to recover its shape.
Replace on evidence, not on a schedule. When the chamois flattens where you sit, when the gripper stops gripping, or when the fabric goes sheer in the light, the pair is done. That is the expiration date, and you can see it before it ruins a ride.
The mistakes that cost you twice
These are the ones I see in the shop every season.
- Sizing up to hide a bad cut. A larger short does not fix a pad that sits in the wrong place. It adds fabric that bunches.
- Wearing underwear. The seams land exactly where you do not want seams, and the cotton holds moisture against skin.
- Buying the cheapest pair and the most expensive pair in the same season. That is the buy twice pattern. Buy one pair, ride it 500 km, and learn what your body actually needs.
- Ignoring the gripper. A hem that creeps turns a good chamois into a bad one by hour two.
- Treating shorts and bibs as interchangeable. They are not. One is convenient, one is faster for long days.
- Never measuring. If you do not know your sit bone width, you are guessing at both the saddle and the short, and you will pay for the guess.
What this all costs
The budget pair and the race bib are not competing for the same buyer, so the math is cost per ride rather than cost per pair. Check current Amazon price for both before you decide, because that number moves.
Here is how I run it. Take the cost of the pair, divide it by the number of rides you will actually do in a season, and compare that against buying a second cheap pair when the first one quits at kilometer 300. A pair that holds its pad for three seasons is cheaper per ride than two pairs that give up in one, and it is a lot cheaper than a saddle fit you have to redo because you were compensating for bad shorts the whole time.
The real cost of the wrong pair is not the money. It is the season you spend thinking cycling hurts, when the actual problem was a measurement you never took. Measure your sit bones, measure your hips, size from the chart, ride 100 km before you judge, and wash them like they are the only pair you own. That is the whole job.